Saturday 4 April 2020

Strange Times

'If you don't do as you're supposed to, you get something else altogether.  As I'm rather into the organic method with butterfly impulse on the side, the finished results are just what they are.'

So says the astoundingly creative author of the wonderful blog 'theinfill', which if you haven't already done so, I'd urge you to visit.

https://theinfill.wordpress.com/about-this-site/

I can't begin to tell you how much those two simple sentences resonates with me.  At this point I  have to be honest and say that for a long time and for some inexplicable reason I've been somewhat frightened of doing things 'incorrectly,' with the coaching inn.  As if there's an absolute right and wrong way of approaching it's construction.  Of course the kit is put together in a uniform way to achieve the basic shell of the building, but everything else is really just down to personal interpretation.   I have no clue why it's taken me so long to work that out, but I have to say how incredibly liberating it feels now that I've done so!

An example of my shiny new liberated way of thinking for instance, is that the coaching inn kit has flights of stairs in both the left and the right hand side of the building - to my mind this takes up rather a lot of space which could be put to better use.  Previously I would have put the staircases in both sides because 'that's how it was supposed to be,' but it would have meant that I'd have had to compromise an idea for one part of the building that I've been mulling over in my head for a few weeks now.  Namely that I really, really, really (yes, really!) want to include a banqueting hall in the right hand side of the house which brings me to my second act of wanton rebellion.....I've decided not to include one partition wall, turning what originally 'was meant to be' two small rooms, into one longer one. Go me!

 And then there's the actual 'do I want it to be an inn at all?' and 'should I keep it entirely tudor?' argument which has battled away in my brain for what seems like an eternity.  I rather think the answer's going to probably end up being 'no' to the first scenario and possibly not to the second, as the structure evolves and takes on an identity of it's own.....in much the same way a lot of our older houses here have over the years.

All this navel gazing and fear of not following the rules meant that I was on the verge of throwing in the towel and giving up on the project entirely, but armed with my new found insight I decided to give it one last go and I can't begin to tell you how glad I now am that I did.....especially in this unprecedented time of self isolation. I can honestly say, that the escapism this is offering me right now is helping me cope enormously with the challenges we are all currently facing.

Anyway.......I first decided to move the structure off of the dining room table and into my craft room upstairs, which was a major task in itself as the thing weighs a ton!  Having got it upstairs I then set about painting the whole thing inside and out with a thin coat of gesso, which gave it more of a uniform look;


In the photo above, the front wasn't actually hinged, nor the windows fitted...rather everything was just propped up to give me an idea how things were progressing.

Next I decided to grout all the brickwork around the front and the side of the house, which proved quite awkward! It's easy enough to get things straight when you're gluing brick slips onto pieces of wood or mdf lying flat on the table, but when you're doing it on an upright wall they have a habit of tilting or sliding down, which made getting even courses of brickwork something of a challenge. I noticed after I grouted that a couple of them weren't very level, but there's nothing a bit of strategically placed foliage won't hide!  At this point I also decided that I wouldn't make the brickwork all the same level around the building, which I think makes for a more interesting and haphazard look.  Easier not to have to match up everything exactly too....why make more work for yourself when you don't have to?


And so onto the beam work. I'd decided early on that I didn't want any of them to be too uniform or look too perfect which was just as well as I rapidly discovered it's near impossible to replicate things perfectly when you're doing everything by hand and judging things by eye.  As you can possibly see, things got stuck on, which I then changed my mind about on more than one occasion, but I'm pretty happy with how things are looking at the front right now;


The doors (one down the alley as well as at the front) I made out of balsa wood as I didn't like the  ones sent with the kit and they'll probably end up with an ornate side hinge at the bottom when I eventually get around to making or purchasing them.  Unfortunately the doors don't open very far but I'm not overly bothered by that at the moment (it'll probably annoy the sweet bejesus out of me later on though!).

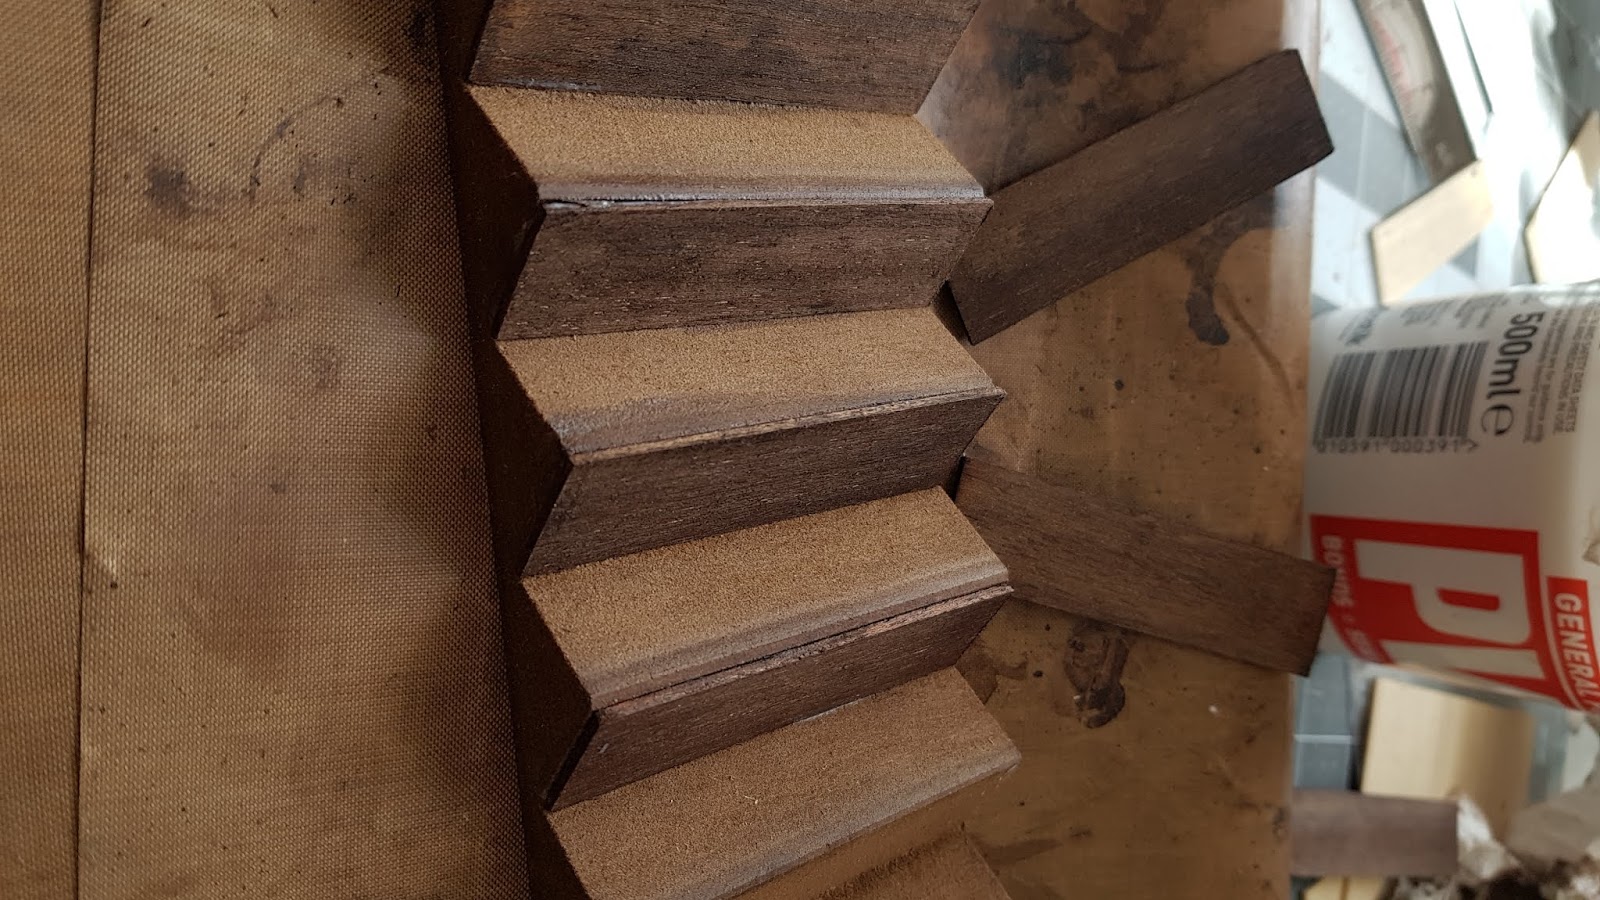
I'm not entirely happy with the beams I've created at the right hand side of the house.  I wish now, that I'd maybe just left all of them running vertically and horizontally rather than include the bottom inverted 'V' shape, but as they're all stuck down now and I'm rapidly running out of balsa wood to make more, they'll have to remain as they are;


I'm happier with the chimney side though.......I think;


And that really is about as far as I've got on the exterior of the house since I last wrote in November.  Where does the time go?  I did have a dabble at creating a carpet for one of the rooms inside using some fabulous CTR punch needles I purchased from the US via Etsy.  I downloaded a free vector image of a heraldic lion I found on the net;


then using a lightbox, I traced it onto some monks fabric and used lots of embroidery floss that I inherited from my grandmother, to create this;


which was a fun diversion.  Unfortunately in this instance, I used a six strand punch needle which I think has made it a bit thicker than I originally intended, but as I have a three and a one strand punch needle also I might experiment a bit more and see how that turns out. After all, it's not as though I don't have much time on my hands at the moment!  Always a silver lining......

As a footnote, if anyone reads this and is interested in following my progress further, I set up an instagram page a while back which I tend to use more regularly than this blog.  It can be found here;

https://www.instagram.com/midsummerminiatures/?hl=en

In all honesty, it's probably easier to follow that than trying to keep up with me waffling on....and on.....and on...... here!

Thursday 28 November 2019

Catching Up

And in the blink of an eye, summer has been and gone and we're rapidly heading towards the Yule festivities. Where does the time go?

I confess I've made very little progress on the Coaching Inn over the last few months and so it's sat, neglected and forlorn on my dining room table gathering dust.

The birth of my first grandchild, and for a while the prolonged ill health of my husband kept me pre-occupied for a number of months, but thankfully things appear to have stabilized and I'm well stocked up on Granny cuddles, which means I can now try and make a little headway with all things miniature.

As I think I've said before, this is my first attempt at building and furnishing a dolls house from a kit, which has proved how shall I say......challenging!  I have now finally managed to construct most of the shell of the Inn but I didn't find following the instructions provided particularly easy and would suggest that perhaps it's time for an update - I mean, even with the best will in the world it's hard to make out what you should be doing from photocopied images like this;


or this;


which make it almost impossible to determine how things should look!  In frustration, I resorted to the internet with a view to looking what other people had done so confess my first bay window, now nearly completed, is a bit of a mishmash though I'm quite pleased at how it's progressing;


Btw, I ended up being able to buy Triple Thick Gloss here in the UK from Amazon, which I used to give the acetate an older, less clear, glass look.  I think in the process I also managed to stick a bit of dust and the odd cat hair or two in with it, but it all adds to the effect!

Recently I saw a wonderful free tutorial on making miniature brick slips by Jennifer Kennedy of Jennifer's Miniatures over on facebook;

 https://www.facebook.com/JennifersMiniatures/

 - so decided that rather than forking out a small fortune on bought brick slips, I'd make my own from polymer clay.


I realize that they're not perhaps truly Tudor looking,  but I rather like the irregularity and they're a lot stronger and more forgiving than bought bricks. The photo here makes them look a little brighter than they actually are in real life but I might eventually end up brushing a light paint wash over them to tone them down a bit more.

And that really is about it for now. I think we're all caught up and still not quite out of the brown phase!

Hopefully it won't take me quite so long to add my next blog entry......

Friday 19 July 2019

A Little Bit of This and That

I've had a week or two away from doing anything miniature.  No particular reason other than it's been horribly hot and humid in my part of the world which has found me disinclined to faff around much. My work table is beneath a south facing window so it sometimes feels like I'm working in a bit of a greenhouse when the sun hits our garden. The last couple of days however have been a little cooler so I decided to press on and build the chimneys, one of which is absolutely huge;


 and make a start on one of the bow windows which will be situated on the ground floor. I'm not a great fan of the acetate which came with the kit - it's very thin and in a couple of places the printed lattice pattern looks to have rubbed off, so I decided to use it as a template and originally bought some lead effect paint, which proved to be both messy and unconvincing.  Searching on the internet I came across a couple of tutorials which then convinced me to bite the bullet and purchase some 2mm lead strip tape in an antique finish, and also some 1mm acetate, strong enough to take the weight of the lead strips.


Fortunately the lead strips have a self adhesive backing which enabled me to lay them directly onto the acetate without making too much of a mess, but it's almost impossible to get a completely straight line with them as the lead is so soft and bendy.  That doesn't really matter though as the Inn is a tudor design and the slight waves kind of add to it's charm.


The photo above isn't that great but you get an idea of how it's all beginning to take shape. I'm toying with the idea of either using some Triple Thick brush on gloss, some clear nail varnish, or some Mod Podge gloss over the top of the windows, which will hopefully secure the lead further to the acetate and create more of an old tudor glass effect.  I watched a video over on YouTube which used Triple Thick and the effect was really convincing.  I'm not entirely sure how easy it is to get that in the UK yet though.

Progress on the rest of the house has been somewhat hampered by one of my cats taking up almost permanent residence there lately.


A couple of weeks ago he brought home a baby bird which he proudly presented to me in our living room.  Fortunately he's an old cat and has had some of his teeth removed so the bird was unharmed and I was able to return it outside to it's very frantic mother, who ever since has dive bombed both myself and our cat each time we set foot outside the back door.  The cat has now taken to hiding in the dolls house whenever Mama blackbird starts making a racket outside - which is almost all of the time at the moment as her brood starts to leave the nest.  I'm seriously considering drawing up a rental agreement for him soon!


Sunday 30 June 2019

Small Steps, Big Learning Curve

In my newbie naivity I confess I had assumed putting together the staircases would be something of a doddle - they're pretty small in the league of things and look pretty straight forward, right? How wrong could I have been!

The kit I've bought comes with three ready made staircases, which I think were mdf in origin rather than some of the wooden ones you see in older houses which is the look I decided I was going for.  My first task therefore, was to make them look as realistic as possible,  and with this in mind I set about cutting some small strips of thin 1.5mm obeche wood for the back panels of the stairs.


These I then stained, feeling somewhat cocky because I'd already learned to use the stain prior to gluing in order to get an even colour coverage.  From there I attempted to glue the cut panels to the mdf stairblock, and it was from here that things started to go pear shaped!


You can perhaps see the mistake I made already by looking at the way in which the grain runs vertically.  I'd cut the obeche wood panel against the natural grain which runs horizontally. This meant that by the time the stain and the glue had been applied, the saturated panels started to curl at the edges and wouldn't lie flat, but instead pinged off of the mdf every time I attempted to fix them into place. And that was despite trying to clamp them into position.  Lesson well and truly learned!

As you can probably see in the photo above I had already managed to make one staircase successfully, but I'm almost certain that was due to good luck rather than any proficiency on my part!

So it was a case of swallowing my pride and starting all over again, remembering this time to cut with the grain rather than against it. And hey presto, it worked...the panels didn't curl and remained glued into place.


And so onto the last photo.....which sadly is yet another dingy brown shot, but shows how the stairs currently look at the time of writing.  As mentioned previously the kit I'm working on is Tudor themed, and although I don't have an exact era in mind when it comes to internal decoration, I figured that I wanted the stairs to look old and worn down over the years.  Because of this I opted to use slightly thicker obeche wood for the actual steps, which meant that I could sand down the middle of the steps to hopefully resemble the effect of continued footfall on them.


I think eventually I'm going to panel the stairs into at least one wall sideways on as you open the front of the house up, and may eventually make my own balastrade rather than using the spindles supplied with the kit, so for now I'm leaving them be and will move onto something else, hopefully less brown!

Thursday 27 June 2019

Getting Started

I've always been fascinated by Tudor buildings and here in the UK we are obviously lucky to be able to visit many edifices built during that particular period in history.  Unfortunately, no matter how much I save up I'm never going to be able to afford one though, so my 'building' this dolls house is probably the likliest way I'm ever going to actually own anything similar.

Having made a start on the external construct I decided to take a break from it while I work out how I want to proceed decoratively.  This has given me the opportunity to work on the external beams which are often a feature of houses built during the tudor period.  Over the centuries, most of the wood has weathered and aged, taking a few knocks here and there, which is something I particularly wanted to capture.  The beams would also have been hand cut, and as such would have lacked the perfect straight edges you often see on modern planed wood. 

In the kit I have, Maple Street Miniatures supply varying thicknesses of balsa wood for the beams, all straight edged and smooth, and it's this which I've been working on over the last few days. 


In the photo above you can see how the beams originally look at the bottom of the picture compared to the beams I've worked on using a carving tool and a craft knife to 'bevel' the edges a little, and a wire scourer and ball stylus to roughen the wood and add little dings and dents to it.  The temptation here is to go a bit mad and add lots of dents etc, but I hopefully restrained myself from going too OTT with them!


Having roughened the wood up I stained the beams using Rustins wood dye in Teak. I did try a couple of other wood dyes to begin with but then found that a couple of coats of the teak stain most resembled the colour I want, which I think has turned out okay.  As the stain dries out it becomes lighter looking which is something to bear in mind when applying it.


As you can see I used a brush to stain the balsa with and learned the hard way (i.e tipping the contents of a tin of wood stain all over my table!) to pour it from the tin into a container within a container.....far better to be safe than sorry!  I also learned that it's just as easy applying the stain with a rag onto balsa, as using a brush, it's really just a matter of personal preference and what you have to hand. The balsa sops up the stain almost instantly either way.  The dropper bottle by the way is Distress Ink, often used in card making, which I thought might work on wood, but I ended up not using it at all.


 And so onto my final photo of the day - the finished result. Cut, scratched, dinged, scoured and stained, looking far more like old beams of wood than when I started. As these are the extermal beams part of me is tempted to paint a little grey colour wash over them to try make them look a little more weathered, but for now I'm just going to leave them alone I think...


Monday 24 June 2019

First Post

So, first post of a new blog.  A blank canvas on which to write. Exciting and daunting in equal measure!

To start at the beginning....

I decided to set up this blog to chart my progress whilst constructing and decorating a dolls house kit I purchased from Maple Street Miniatures here in the UK.  The kit I chose was 'The Olde Coach Inn' as I've always had a craving for some kind of beamed house, and within my price range it seemed the best of of the many houses I've looked at over the last few... well, months really.  To be honest I was also encouraged by the fact that it was apparently fairly easy to put together with 'just a crafting knife and a screwdriver.'  I've never built anything from a kit before so liked the notion of it being an 'do-able' challenge.

I hadn't bargained for quite how many bits and pieces there are to put together though...

62 parts to make the basic framework of the house plus a variety of packs of beams, stair spindles, hand rails, roof tiles, windows, doors and hinges, which were all checked off and packed neatly into two huge boxes, delivered hassle free straight to my door.

It was at this point I began thinking maybe I should have started with something a tad less ambitious.

I would never admit to the fact that I was intimidated by the contents of the boxes, but they did stand propped up in my lounge for a good month or two before I plucked up the courage to start unpacking everything. You can draw your own conclusions from there!

So now I have a dining room table, completely overrun with bits of mdf, masking tape.....oh and a box of plasters because I've already managed to cut my finger, and I haven't even started to glue everything together yet as you can see from the photo...


My first real dilemma is whether to crack on and put together the entire framework of the house, or whether to wait and individually decorate each piece before gluing everything permanently.  The latter option would definitely make things easier i.e no having to grub around in small spaces gluing beams and plastering walls etc - but wouldn't it be awful if I did all that and ended up finding that the pieces didn't fit together - which given my track record so far is entirely possible.  Plus if I did do it that way I wouldn't get a true sense of how everything looks, which will undoubtedly influence how I want to proceed decorating the thing.

Think I might have to go away and ponder on that a while....